1. Click “Appointments” #
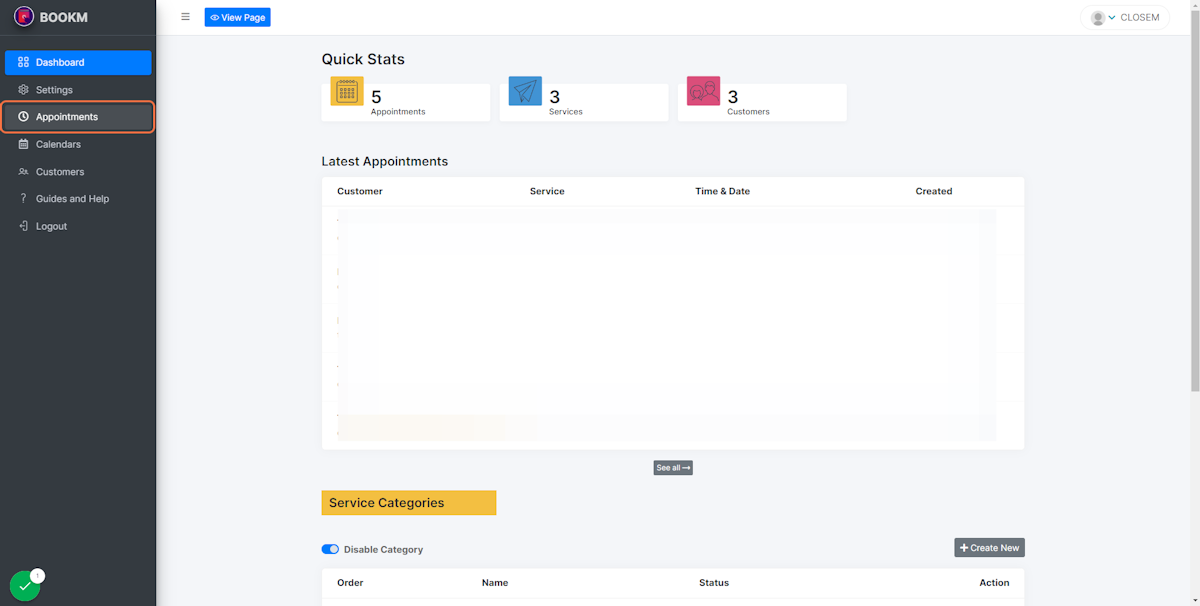
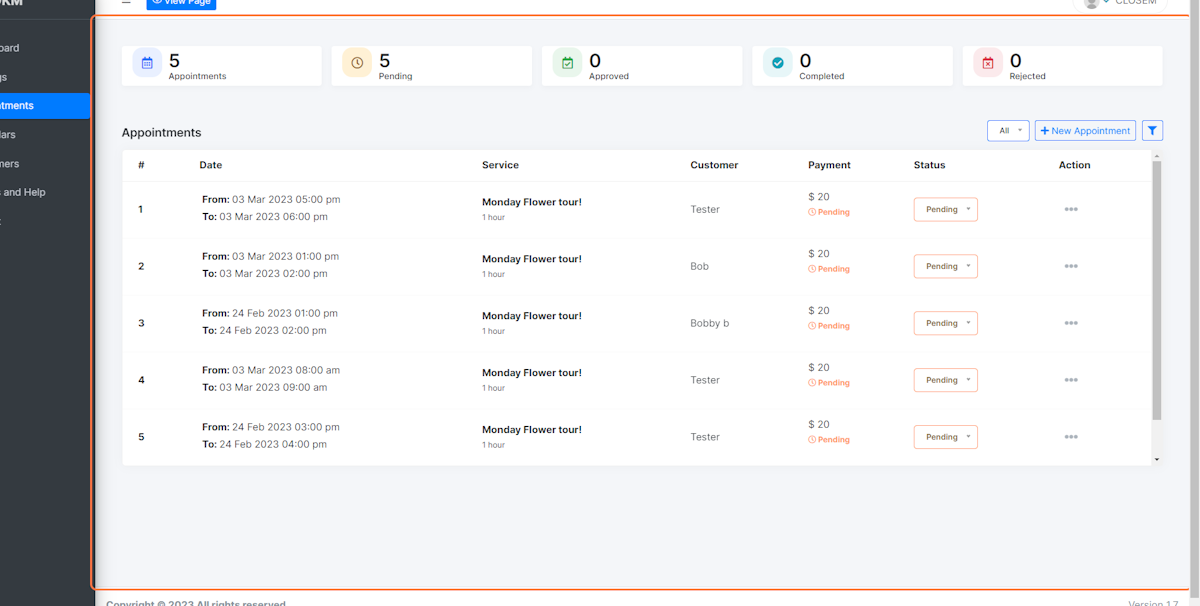
2. Appointments overview #
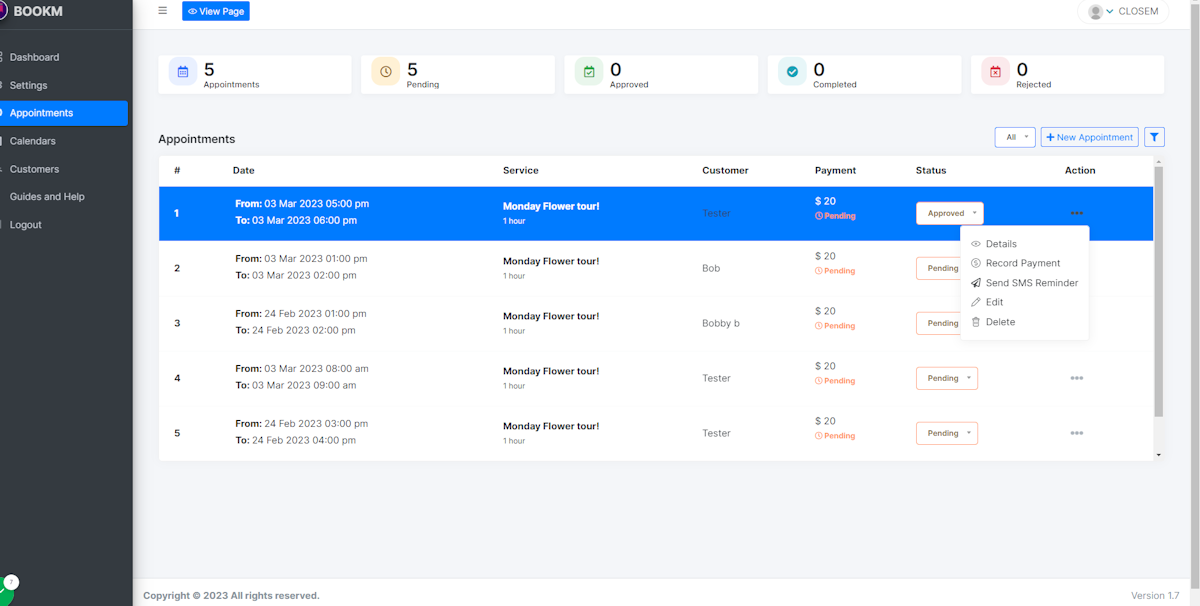
This page displays a comprehensive list of all your scheduled appointments, along with their respective statuses. Any client bookings made via the booking page will appear here.
The appointment statuses are as follows:
Pending: The appointment is currently waiting for approval.
Approved: The appointment has been confirmed and is scheduled for the specified date and time.
Completed: The appointment has concluded. You can modify the status of any appointment at any time
3. 3 dots icon #
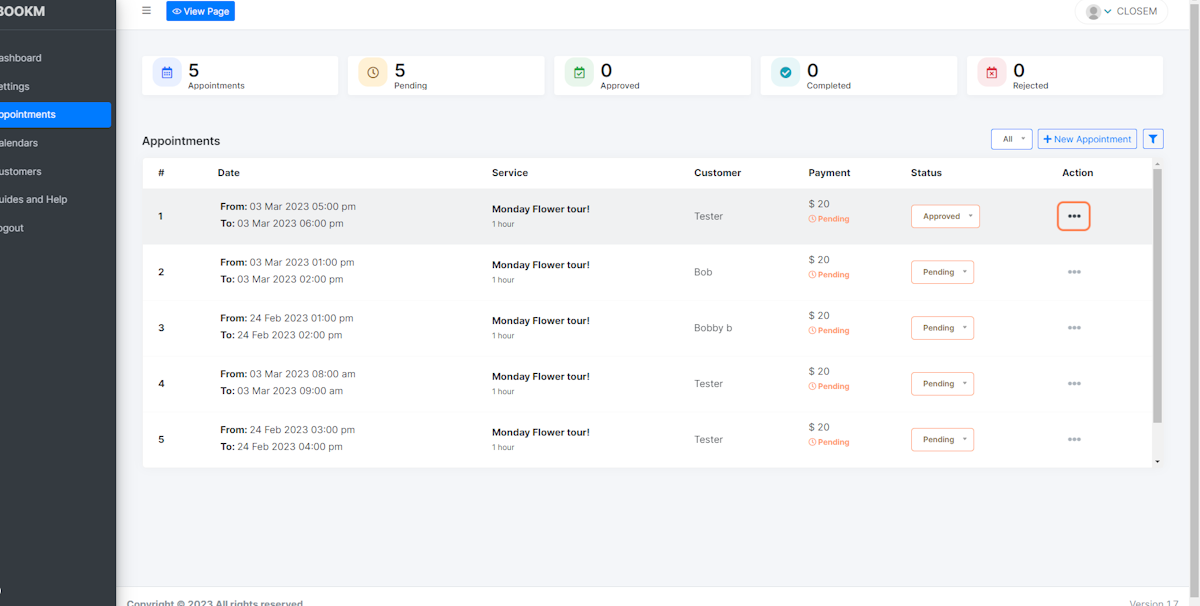
4. Click on menu #
When a customer books an appointment with you, you will have access to the following information: (access this drop down by clicking the 3 dots icon next to the specific appointment on the right)
Details: You can view all the details of the scheduled meeting, including the customer’s contact information, any links related to the meeting, answers to any additional questions asked during the booking process, and the date and time of the appointment.
Record Payment: If payment has not been made yet, you can record the payment information on this page.
SMS Reminder: If you have set up a Twilio account, you can send an SMS reminder to the customer about their upcoming appointment.
Edit: You have the ability to edit the customer’s information, such as their name or contact details, if needed.
Delete: You can also delete the entire appointment if necessary. By having access to this information, you can ensure that you are prepared for the upcoming appointment and make any necessary changes as needed
.
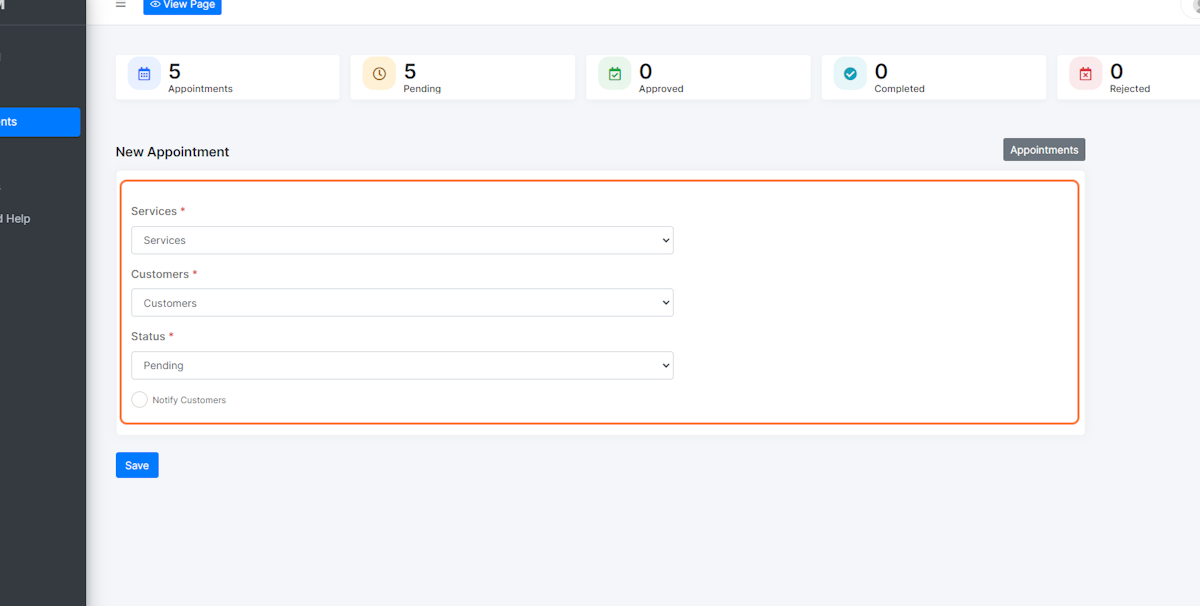
5. New manual appointments #
You can manually re-book appointments with existing customers.

6. How to: manual appointments #
To manually re-book a service, follow these steps:
Select the service you want to re-book from the list of available services.
Pick an existing customer from your customer list to assign to the newly re-booked service.
Choose the customer’s status, such as pending, approved, or rejected, to reflect the current state of the appointment. Optionally, select whether or not to notify the customer about the newly created appointment.
Click “Save” when you are done.